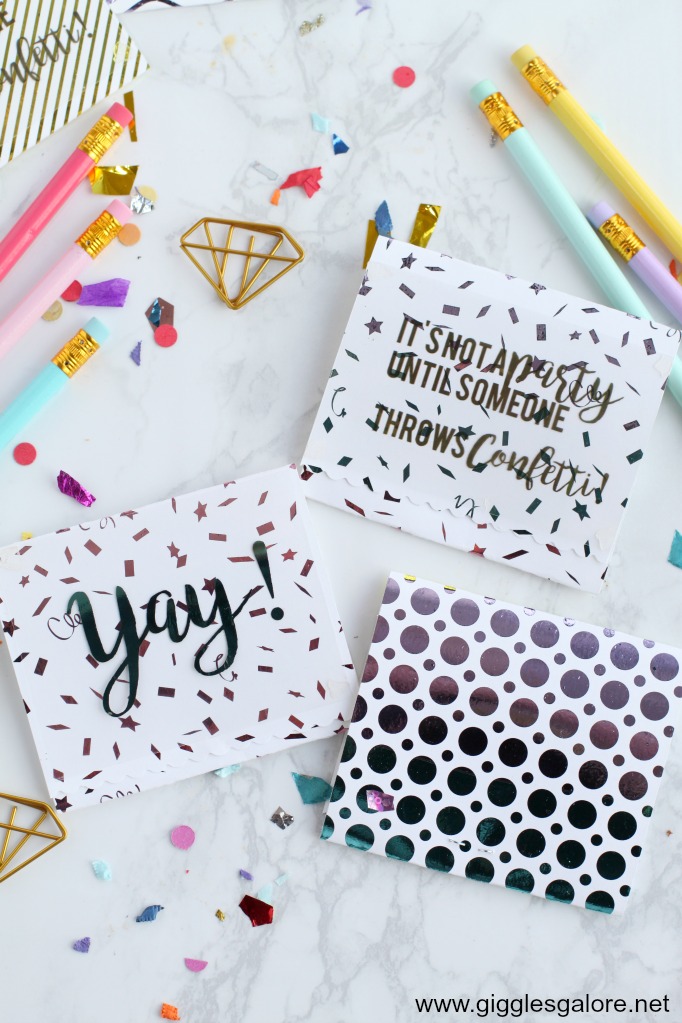
I am all about parties and celebrating life. So, naturally, when I saw the new Foil-Mates™ designs from Thermoweb I just couldn’t pass up an opportunity to create a fun party idea to share with you today. Inspired by the confetti design in the new Gina K. Designs FOIL-MATES™ Backgrounds WHERE’S THE PARTY? package I thought it would be fun to create these colorful DIY Confetti Favors with Fancy Foils.

To be completely honest I have a love hate relationship with confetti. I absolutely love using it at parties, tt’s always makes such a fun colorful party and everyone seems to have fun tossing it in the air and watching color rain down. But, I hate cleaning it up. I’ll find confetti in my house for months after a party. While at times it may be a mess I still think the saying “life’s better with confetti” is so true. It just makes everything feel more colorful, festive and fun! Wouldn’t you agree? If you said yes, then I know you will love this quick and easy DIY.

What You Will Need:
- GINA K. DESIGNS FANCY FOILS™ 6″ X 8″
- Wild Lilac
- Passionate Pink
- Turquoise Sea
- Jelly Bean
- GINA K. DESIGNS FOIL-MATES™ BACKGROUNDS • BOLD BACKDROPS
- GINA K. DESIGNS FOIL-MATES™ BACKGROUNDS • WHERE’S THE PARTY?
- Clear Designer Toner Sheets
- Zots roll medium
- Confetti
- Small clear cellophane bag
- Paper trimmer
- Laminator
- Stapler

Step 1:
Use a paper trimmer to trim the Foil- Mates paper to 3 1/2″ x 6″.

Step 2:
Cover the Foil-Mates background with desiered Fancy Foils sheet. Place inside the parchment sleeve and run it through the hot laminator. Peel back the foil sheet for instant shine and added dimension to your design.


Step 3:
Fold the top part of the background paper down, leave about 1/2″ at the bottom so that your folds resemble a matchbook.

Step 4:
Fill the small clear cellophane bag with confetti, fold over to close and staple to the bottom part of the matchbook.

Step 5:
Use the medium sized ZOTS to close and secure your confetti favors.

Step 6:
Print confetti inspired quotes or celebration sentiments on the clear designer toner sheets. Trim the design to fit on top of your confetti favor, use zots to attach them to the front of each book. If you want you can also add extra shine to the words with the Fancy Foil sheets.

Step 7:
Hand out your DIY Confetti Favors with Fancy Foils to party guest…after all “it isn’t a party until someone throws confetti!”

This fun and fancy DIY is perfect for any kind of celebration and can be customized with colors and sentiments to match your theme. I think these little favors are perfect for birthdays, but could also see these being lots of fun and graduation parties or weddings too.


What a fun and colorful party! Love the idea for printing on the Deco Foil Clear Toner Sheets to make your own messages too!