Last year when Cricut announced the new Cricut Maker I was giddy with excitement about all of the possibilities this new machine would provide. I have always loved creating with my Cricut (I’ve had one version or another for more than 9 years!) but I couldn’t wait to start creating projects with the Rotary Blade and the Knife Blade. While we had to wait a while for the arrival of the Knife Blade, I think it’s been well worth the wait! 
I have been playing around with my Knife Blade for about a month now, and I’ve been having lots of fun trying out all kinds of new projects and materials, it’s amazing what this new tool can do. I’ve recently showed you how to cut leather with my DIY Leather Luggage Tags and today I thought I would talk to you about how to cut chipboard with the Cricut Knife Blade and show you how to make a cute and simple chipboard anchor cake topper.
Chipboard is one of the materials I was especially excited about using with the Knife Blade. I think it’s one of the most versatile materials that can be used for all kinds of projects from party decor to home decor. It’s also less expensive than some of the other materials, which gives me the freedom to experiment a little bit more than I would with some of the other materials.
Before I show you a fun and simple patriotic cake topper I made for the upcoming holiday let’s talk about what you need to know about cutting chipboard with the Knife Blade:
- The Knife Blade works best with 2 mm Cricut chipboard, which is made of high grade materials and specifically designed for use with the Knife Blade.
- The maximum size of cuts for chipboard projects is 10.75″ x 10.75″ and the minimum size of cuts shouldn’t be smaller than 0.75″ x 0.75″.
- You need to use the StongGrip mat for your chipboard projects.
- A brayer should be used to create a firm bond between the chipboard and the adhesive surface of the mat.
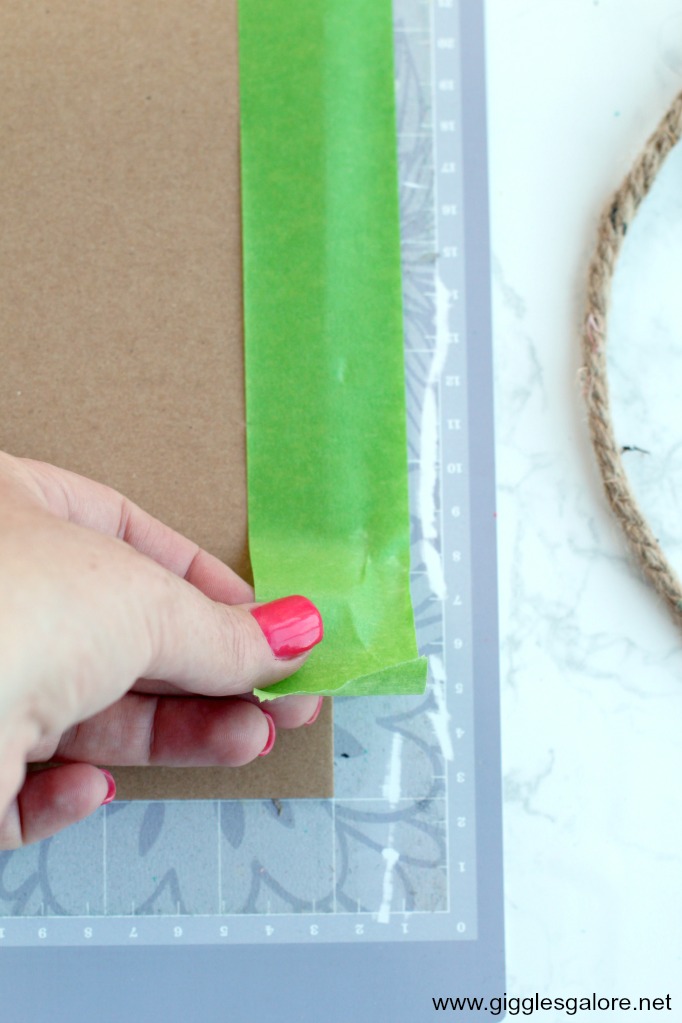
- Tape the top and bottom edges of the material to the mat with masking tape or painters tape.
- Make sure you move all white star wheels to the right before you load your mat.
- Once the project is done cutting, before you remove the mat you will want to examine your project by pulling up a corner or edge piece to make sure all pieces have been completely cut, if not Design Space will allow you to select and add one more cut pass to complete the cut.
- It’s important to note that thicker materials require multiple cut passes with gradually increasing pressures to cut through successfully, which means the duration of the cut will vary depending on the size and intricacy of the images being cut, so make sure you remember to plan ahead and be patient.
Ok, now that we know the basics of working with chipboard let’s create something fun. I made this simple custom anchor cake topper for our upcoming nautical themed Memorial Day celebration.
Supplies:
- Cricut Maker
- Cricut Knife Blade
- Cricut 2mm Chipboard
- StrongGrip Mat
- Painters Tape
- Clear Acrylic Sealer
- Blue Spray Paint
- Twine
- Lollipop Stick or Bamboo Skewer
Step 1:
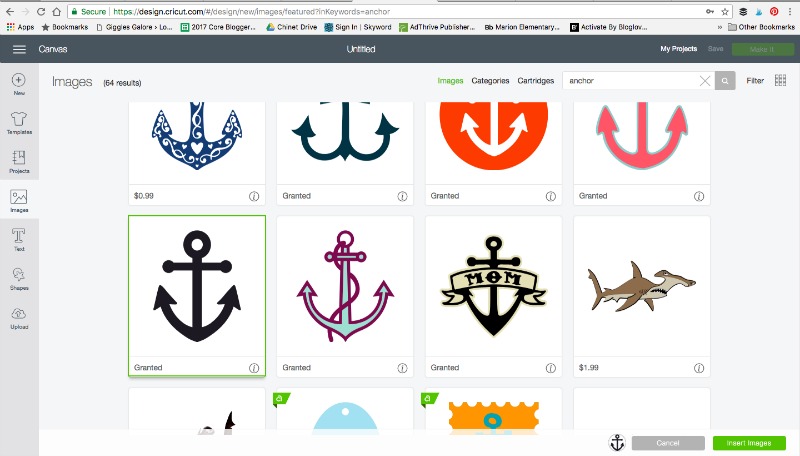
Open up a new canvas in Cricut Design Space. Click on the image tab and then search for an anchor design you like.
Step 2:
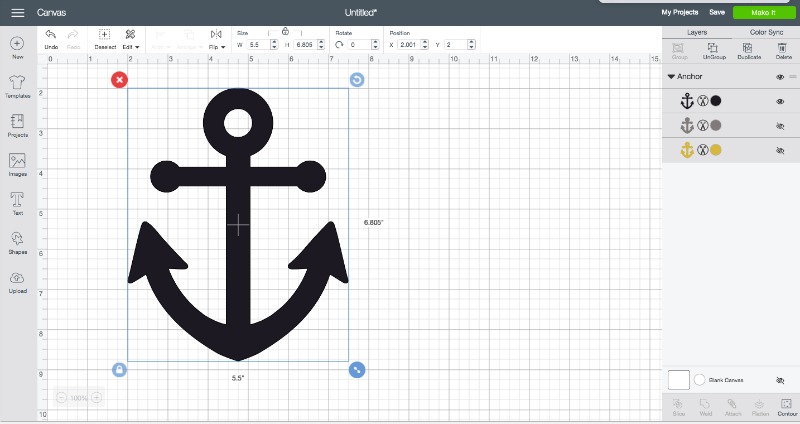
Resize the image to proportionately fit the size of your cake.
Step 3:
Tape the chipboard down to your StrongGrip mat. I like to use painters tape, but you can also use masking tape.
Step 4:
Click on “Make It” and then select the 2mm chipboard from the materials list.
Step 5:
Once the project has finished cutting, use the weeding tool to gently lift up a corner of the design to make sure it has cut all the way through.
Step 6:
You need to seal the chipboard before you paint it. I like to use Americana Gloss Sealer, but you could also use Modge Podge or Gesso. Once that is dry spray your anchor with blue spray paint, one coat of paint was perfect.
Step 7:
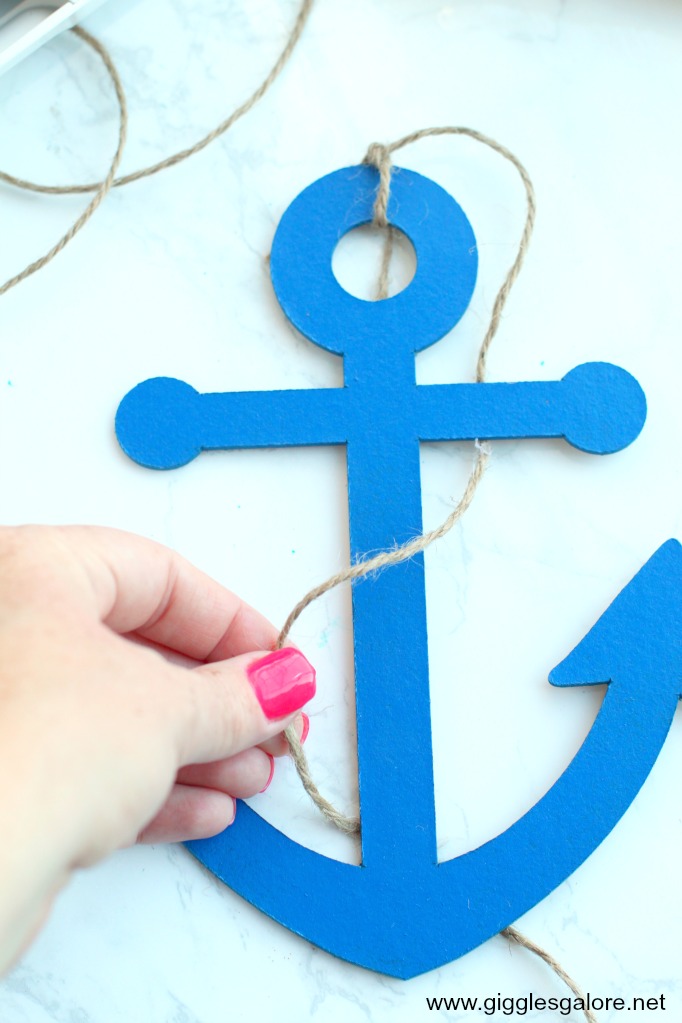
Tie a piece of rope twine to the top part of the anchor. Thread the twine around the anchor the anchor, add a dab of tape or hot glue to the back to hold it in place.
Step 8:
Flip the anchor over and hot glue or tape a white lollipop stick or bamboo skewer to the back of the anchor.
Add your super cute and easy custom anchor cake topper to your cake. I also made smaller versions of this cake topper to place in the cupcakes.
This is such a fun way to add a personalized touch to your parties. I can see lots of chipboard projects with the Cricut Knife Blade in my future. I think the next chipboard project I’m going to tackle will be some fun home decor designs. What type of projects will you create with chipboard?








Leave a Reply