Typically when it comes to decorating Easter eggs around here it is usually lots of messy fun with bright colored eggs and silly stickers. The kids always have a blast, but this year I wanted to make my own version of grown up Easter eggs because the kids shouldn’t get to have all the fun, right!? If you are looking for something this year I have you covered with my Natural Easter Egg Decorating Ideas! Plus, I’ve teamed up with 3 other bloggers to give you even more inspiration for decorating your Easter eggs this spring.
Last November at the Food Fight Write conference we were given coupons for one of the sponsors, The Happy Egg C0 which prompted me to try them. And it was life changing. These eggs are the next best thing to having a hen in our backyard (which in the suburbs isn’t really an option for us.) My love affair with my new Happy Eggs inspired me to create these easy, pretty and natural Easter eggs.
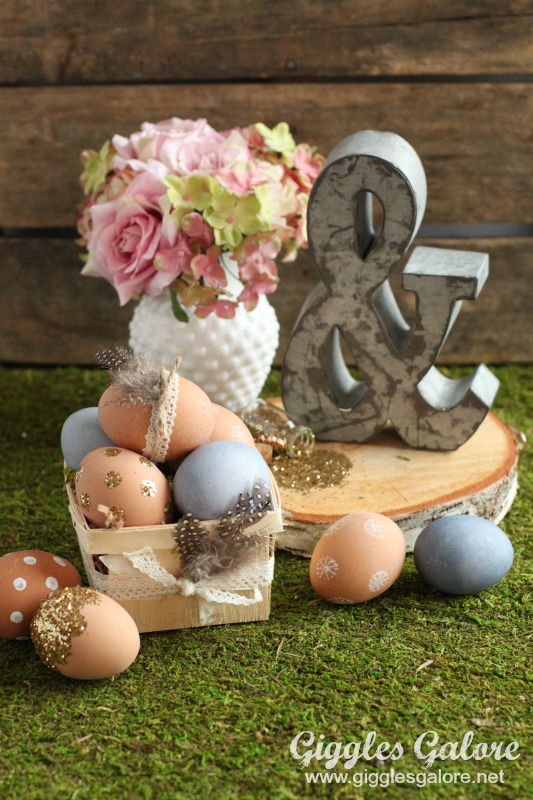
I used white paint, stamps and gold glitter to make my natural Easter eggs. I started by brushing white paint onto a stamp with a small paint brush. Then I gently stamped the simple design on the hard boiled eggs with white paint. I dipped the eraser of a pencil in the white paint to create polka dots on several of the other brown eggs.
Finally, I glammed up the rest of the Easter eggs with gold glitter. I used a paint brush to apply a thin coat of Modge Podge to the eggs and sprinkled them with glitter.
I have also always wanted to try using natural dye to make Easter eggs and when the blueberries I bought the other day were too sour to eat I decided that instead of throwing them out I’d use them to try dying Easter eggs. It was so simple and I love how they turned out. The soft bluish purple hue is exactly what I had in mind for my grown up version of Easter eggs this year!
To make the dye I boiled the blueberries with a pinch of salt in 2 cups of water for 12 minutes. Then I strained out the liquid into a small plastic cup. I added and stirred in 2 Tablespoons of white vinegar. Next, I submerged my hard boiled eggs in the dye until they reached the desired color. It took less than a minute to get the soft light blue color and the slightly darker colored egg was left in the dye for roughly 2 minutes.
This was such a simple and easy way to create natural Easter Eggs. And these fancy eggs will make create centerpieces displayed in wooden berry baskets at our Easter Brunch. Of course, the kids and I will still dye Easter eggs and have lots of messy fun creating memories, but I’m really digging my Natural Easter Egg Decorating Ideas.
Make sure you click on over and check out the 4 fun ways to decorate eggs from my friends.

Glitter Color Block Wooden Easter Eggs | Rustic Industrial Easter Eggs
Natural Easter Eggs | Book Page Easter Eggs
What is your Easter egg decorating style? Leave a comment, I love to hear what other people do for the holidays!


These are beautiful! I’m a glitter gal, so I’m partial to the glitzy ones, though they all came out great! I can’t wait to try these out!
What a lovely idea – such pretty results. Hope everyone appreciates their Easter baskets when they receive them.
Oh my…BEAUTIFUL! Pinned and tweeted. Thank you for being part of our party. I hope to see you on Monday at 7. Lou Lou Girls
I love the color of these eggs, and I love the glitter. Thanks for sharing.
So pretty! I love your Easter eggs! Thanks for sharing great tutorial!
Happy Easter to you and family!
Hugs and love from Portugal,
Ana Love Craft
http://www.lovecraft2012.blogspot.com
Thank you Ana, these are some of our favorite Easter eggs. I hope you had a beautiful Easter celebration.
I love the easter egg on top – it looks like it would be a flapper if it had a little egg body! I love the whole look you put together.
Thank you Candace, I hope you had a beautiful Easter celebration.