Do you have a celebration coming up that you need a cake for? This is the easiest 4-tier birthday cake you will ever make, and makes a great focal point at any celebration! Today I’ve teamed up with FloraCraft to show you how to create this fun and colorful no-bake candy birthday cake!

When I received my cake form for this project I had lots of ideas swirling around in my head. I had a teacher appreciation idea, a Father’s Day gift, Mother’s Day centerpiece and in the end my kids idea to make a candy cake won. I often turn to my kids for advice and thoughts on projects and I should have know that they would have been over the moon excited about the potential opportunity for lots and lots of candy in their future. One of our friends is celebrating their birthday with an 80’s themed birthday party at the skating rink later this week, so I volunteered to bring this fun cake for the party table centerpiece. Not only will it look great it doubles as a self serve candy station the kids can grab their favorite treats from as well.

What You Will Need:
- FloraCraft® Styrofoam® Cake Forms – 11″, 9″, 7″ and 5″
- Multi-surface Glue Dots
- Scrapbook Paper
- 1 package of Nerds candy
- 1 package of Laffy Taffy candy
- 20 packages of Pop Rocks
- 1 package of candy buttons
- Salt water taffy
- Sugar candy sticks
- Carnival lollipops
- Large gumballs


Step 1:
Start with the largest 11″ FloraCraft® Styrofoam® Cake Form, this is my favorite type of product for this project, and begin attaching the Pop Rocks to the cake form with the multi-surface glue dots. The Pop Rocks will form the base layer of your candy cake. Set this layer aside until the very end, it will make it easier to work on the other layers.

Step 2:
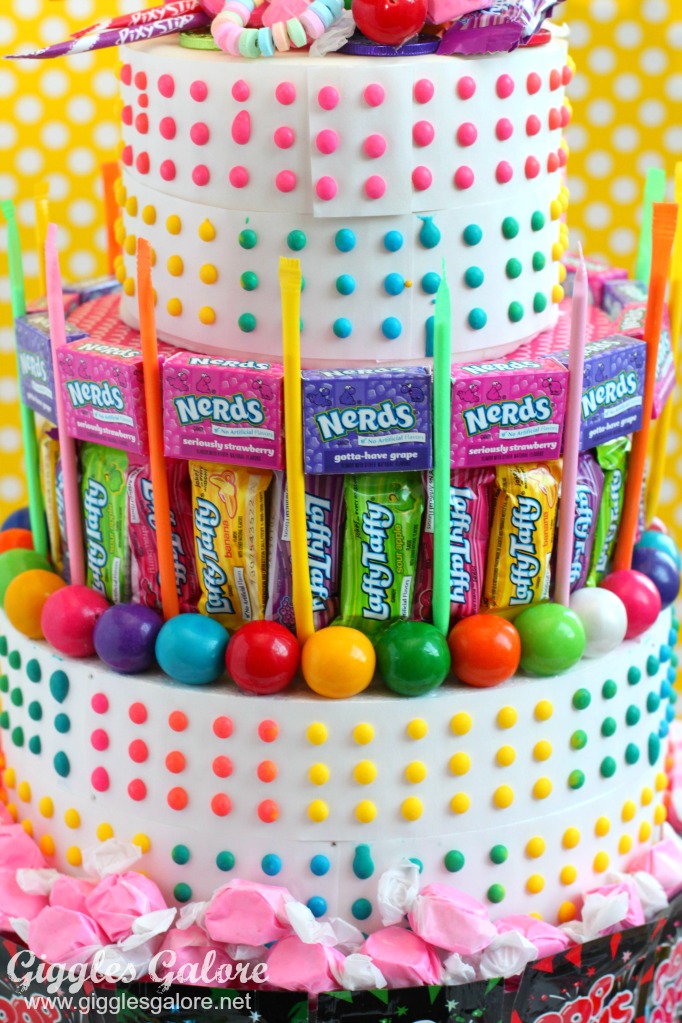
For your next layer you will need the 9″ FloraCraft® Styrofoam® Cake Form. This layer will feature the candy buttons and gumballs. I used the glue dots to attach the candy buttons to the cake form. However, I used hot glue to attach the gumballs to the top edge of the cake form. This is the only part of the candy cake that won’t be edible. In hindsight I could have probably used melted chocolate so that everything would have been edible, oh well maybe next time.

Step 3:
Now it’s time to add the 7″ 3rd layer of your cake. For this layer, I used the Laffy Taffy candy and Nerds. I slipped the bottom part of the Laffy Taffy wrapper down in between the gumballs and attached it to the cake form. Once I had all those in place I added the Nerds candy boxes.


Step 4:
Cut a piece of scrapbook paper to fit on top of the 3rd layer. Note, that you will want to trace the outline of of your 7″ and 11″ cake form prior to adding the candy. It will be easier, trust me…I may know from experience.

Step 5:
For your final layer cover a 5″ cake form with the candy button paper. Create a “cake topper” with a variety of candy. I used colorful carnival lollipops, salt water taffy, chocolate coins, gumballs, and sugar candy sticks.

Step 6:
For your final step you will carefully transfer the 3 candy cake tiers to the top of the large base. I used a few of the glue dots to help keep each of my layers in place. Fill in the space between the Pop Rocks and the 2nd candy button base with salt water taffy.
Step back and enjoy your super sweet no-bake candy birthday cake. This fun cake would be perfect for a sweet shop themed birthday, a carnival party, an 80’s skate party or for an ordinary birthday that you want to make extraordinary! This was a super easy “cake” to make too, it took me less than 20 minutes to put it all together. I’d love to hear what you think, would you make this no-bake candy birthday cake for one of your celebrations?


I have found that kids think they want cake but then don’t end up eating much of it, so this is a great alternative. So fun and colorful.
Beautiful! But how to do serve something like that
Hi Clara, we used ours more for decoration than anything, but if you want to eat the candy you can just pull the pieces off since they are all wrapped.
Hi my name is Natasha and I’m wondering what is your prices on your cake.my birthday is next month ßo can you contact me at my email address thank you.
Hi Natasha, unfortunately, I do not sell the cakes, I just provide the ideas and inspiration for you to recreate your own version of it. 🙂
Great job.Love the cake I am going to try and make it for my granddaughters 8th bday party.Better than chocolate because its melts faster.
Did you use 4 foam cake pieces? Your post states 3, could you verify which sizes exactly you used please. Love the idea!
Hi Sandy, yes you are correct my cake was a 4-tier cake and I used 11″, 9″, 7, and 5″ foam cake forms. You can make it 3 tiers if you want, you would just need to decide which 3 sizes you want to use.