It’s been quite a while since I’ve used my sewing machine, but today I dusted it off and made cloth masks for my family. Today I’m going to show you how to make cloth masks with Cricut, and give you a few tips to help along the way.

For the last several weeks we have been practicing social distancing, learning at home, and quarantine. These are definitely strange times, but it’s in stressful times like this that I turn to crafts. Crafting is one of my true passions, I love being able to use my hands and create something that will be useful or bring joy to others.
When the CDC recently made the recommendation that all people venturing outside of their home for essentials wear masks I knew just how I was going to comply. Cricut created a tutorial and pattern to help crafters like you and I make their own masks at home. I used the pattern provided and my Cricut Maker to crank out dozens of masks in one afternoon.
If you don’t have a Cricut Maker you can still create handmade masks using the pattern, or their tutorial for new-sew masks.
What You Need to Know About Cloth Masks
First and foremost this mask is NOT rated for disease control. The CDC continues to study the spread and effects of COVID-19 across the United States. Studies show that a significant portion of individuals with coronavirus lack symptoms (“asymptomatic”) and that even those who eventually develop symptoms (“pre-symptomatic”) can transmit the virus to others before showing symptoms. This means that the virus can spread between people interacting in close proximity—for example, speaking, coughing, or sneezing—even if those people are not exhibiting symptoms. In light of this new evidence, CDC recommends wearing cloth face coverings in public settings where other social distancing measures are difficult to maintain (e.g., grocery stores and pharmacies) especially in areas of significant community-based transmission. For more information be sure to visit the CDC website.

Cloth Mask Supplies
- Cotton Fabric (should be 100% tightly woven cotton or cotton/poly bend)
- Patterned fabric for outside, 8″ x 16″
- Patterned fabric for inside, 7″ x 16″
- 1/4″ Braided Elastic
- Cricut Maker
- Cricut Large Adult Cloth Mask SVG
- EasyPress Mini
-
Brayer
-
Washable Fabric Pen
-
Scissors
-
Small Safety Pin
-
Sewing Machine

How to Make Cloth Masks with Cricut
How to Make Cloth Masks with Cricut
Help prevent getting sick and learn how to make cloth masks with Cricut
Materials
- Cotton Fabric (should be 100% tightly woven cotton or cotton/poly bend)
- Patterned fabric for outside, 8" x 16"
- Patterned fabric for inside, 7" x 16"
- 1/4" Braided Elastic
Tools
- Cricut Maker
- FabricGrip Machine Mat -12" x 24"
- Brayer
- Washable Fabric Pen
- Scissors
- Small Safety Pin
- Sewing Machine
Instructions
- Gather all of the pieces and press if necessary.
- Match up dark blue outer pieces, right sides together and sew the curved portion with a 1/4" (6 mm) seam. Repeat with the liner piece. Snip along the curve, careful to not cut through the stitching.
- Press the straight edges down about 1/4" (6 mm) away from the edge on the liner.
- Stitch close to the edge on the liner piece.
- Press the straight edges down about 1/4" (6 mm) away from the edge on the liner.
- Fold the outer piece over and press to create the casing for the elastic. Stitch close to the previously pressed edge to leave enough room for the elastic.
- Press the curved seam to one side and topstitch along that side of the curved seam of each the outer and liner pieces.
- Align the outer and liner pieces, right sides together, and stitch along the top and bottom with a 1/4" (6 mm) seam. Backstitch to reinforce seams where necessary. Leave the sides open.
- Trim and snip as necessary. Turn through one of the side openings and press all seams. Topstitch along the top and bottom, reinforcing as necessary.
- Thread elastic through the bottom casing on one side using a small safety pin. Continue threading through the top of the other side of the mask until you meet back up with the other end of the elastic.
- Connect the elastic with a zigzag stitch, making sure that elastic is not twisted. Move the stitched part of the elastic into the casing for comfort.
- Place a filter in the mask through the side openings if desired.
Cricut has provided a pattern for cloth masks and a full tutorial with instructions which you can find here. After making a few of them myself I realized I’m a very visual learner so I’ve created a step-by-step tutorial, with my tips and tricks for making these cloth masks.

Start by ironing your fabric and then placing the fabric pattern side down onto the mat with the grain running the length of the mat.

Click the Make button to get started. You will be prompted to insert the washable fabric pen. I don’t normally use this when sewing, but it was key to mark the lines and made this project come together quickly.

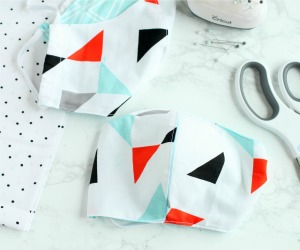
Once the machine has cut out all the pieces lay them out and match them up, right sides together (pattern to pattern).

With the right sides together sew the curved portion of the outer piece of the mask with a 1/4″ seam. Repeat with the liner piece.
Once the pieces are sewn together, snip along the curve about 1/4″ apart, careful not to clip through the stitching.

Use the EasyPress Mini or iron to press the straight edges down about a 1/4″ away from the edge on the liner. Stitch close to the edge on the liner piece. Here’s a tip: You will sew and press on the printed lines.

Press the straight edges down about 1/4/” away from the outer piece.
Fold the outer piece over again about 1/2″ and press to create the casing for the elastic. Stitch close to the previously pressed edge to leave enough room for the elastic.


Press the curved seam to one side and topstitch along that side of the curved seam of each the outer and liner pieces. Even though the Cricut directions say that you need to press the curved seam to one side, it is just as effective to press the seam flat with wrong sides together, then do the top stitching, while holding the folded seam to the side with your fingers as you sew.

Alight the outer and liner pieces right sides together and pin them in place. Stitch along the top and bottom with a 1/4″ seam. Backstitch to reinforce seams where necessary. Be sure to leave the sides open.

Trim and snip as necessary. Then turn the fabric right side out through one of the openings. Press all seams and topstitch along the top and bottom, reinforcing as necessary.
Use a small safety pin and attach it to a piece of 20″ elastic. Thread the elastic through the bottom of the casing on one side and continue threading through the top of the other side of the mask until you meet back up with the other end.

Connect the elastic with a zigzag stitch, making sure that elastic is not twisted and reinforced. Move the stitching part of the elastic into the casing for comfort.
Place a filter in the mask through the side openings and wear when you leave your house.


Leave a Reply