This Halloween forget the tricks and just give a sweet treat, along with one of these spooktacular DIY Halloween Gift Card Tags! These cute little holders make great gifts for teachers, co-workers or friends. I personally love spoiling my kids teachers, they are amazing people who go above and beyond daily, and this little gift is a nice way to say “thank you.”
I’ve teamed up with Thermoweb to show you how you can make these fancy and fun gift card tags. You are going to love how easy these are to make, not to mention how pretty they are too!
What You Will Need:
- Gina K Designs FOIL-MATES™ Background – Polka Dot Party
- Gina K Designs FOIL-MATES™ Background – Stars & Stripes
- Gina K Designs Fancy Foils™ – Sweet Mango
- Premium Black Cardstock
- Laminator
- Black and White Twine
- Mini Clothespins
- Glue
- Black Vinyl Saying or Stamp (optional)
Step 1:
I used my Cricut Maker to cut out a large scallop edged tag. You will need to cut out one tag in the black cardstock and one from the FOIL-MATES™ Background for each tag you are making. Or you could mix it up and use two pattered tags, but either way you will need 2 tags per gift card holder. 🙂
Step 2:
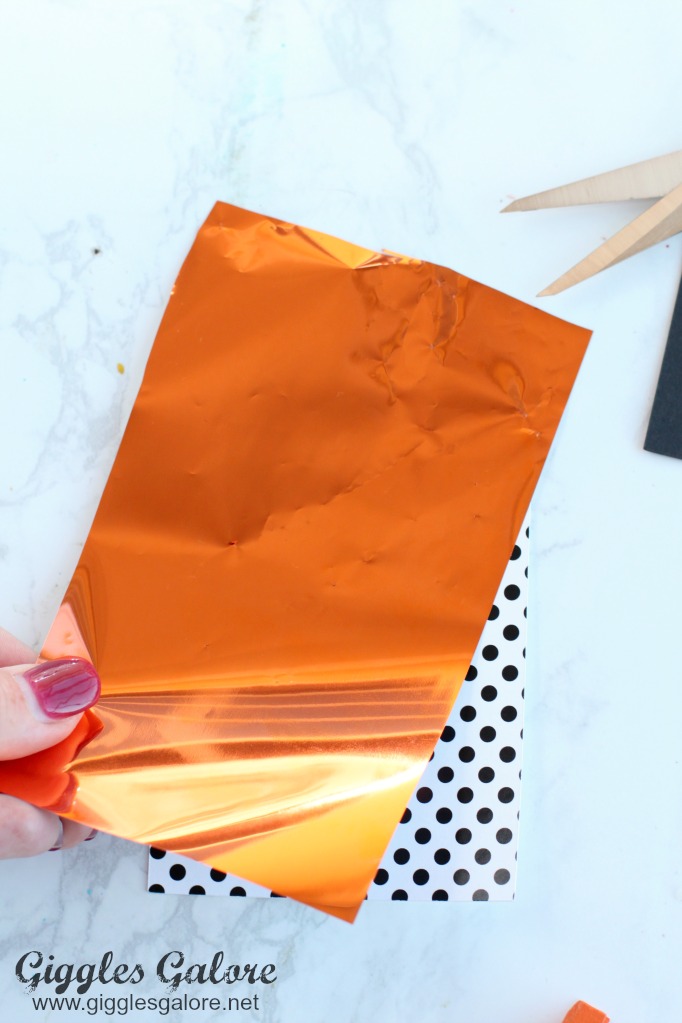
Cut a piece of the Fancy Foils™ slightly larger than the tag. Place it on top, colored side up, of the patterned tag.
Step 3:
Place the tag and foil inside the parchment envelope and run it through your laminator.
Step 4:
Remove the tag from the envelope and peel back the foil to revel the fancy new design. This is the coolest part, it’s like magic but so much prettier!
Step 5:
Cut your patterned tag on a diagonal so you can create a “pocket” for your gift card.
Step 6:
Adhere a vinyl saying like “No Tricks, Just Treats” or “Treat or Treat” to the patterned foil tag. If you don’t have a cutting machine, or you don’t want to mess with the vinyl you can always stamp a saying on the front of the tag in black ink.
Step 7:
Use glue along the left edge, bottom edge and part of the right edge to adhere the patterned tag to your black cardstock tag. You should have a little “pocket” that you can now slip a gift card into.
Step 8:
Tie a ribbon to the tag, or use a mini clothespin to attach your DIY Halloween gift card tag to a goodie bag full of Halloween treats. Make someone’s day and give these sweet little gifts to friends, neighbors or teachers this Halloween. You can easily add vibrant color and brilliant shine to any project with the Fancy Foils from Thermoweb. Don’t you just love how simple and pretty this sweet little gift is?!
And the best part is you can make a bunch of these in no time at all. In fact, I made 6 of these tags in under 15 minutes, that’s my kind of an easy peasy, thoughtful gift! So easy in fact Thermoweb and I want to give you the chance to make your own DIY Halloween Gift Card Tags and are giving one lucky winner the chance to win a $40 gift card, enter below for your chance to win.


Oh My Goodness!! Hi Mariah! First of all, Love the name of your Blog. I use to be called Giggles by several friends of mine years ago… I love crafts, I am a very artistic person. A Grammy, A Mom . I hail from Cape Cod Ma., & Live in Ocala, Fl. My sweetheart & I are planning a surprise 89th Birthday party for his Mom. It is is this fabulous room called the Vintage Room, creams, white, shabby chic, bronze, crystals, mirrors..It is amazing. I am trying to figure out a simple but lovely centerpiece, not too big, for each table. I have a couple of idea’s & will do them later this Month. I have thought about starting a blog, but I know there is a whole lot to it. I imagine yours is very successful. I hope you & yours have a wonderful Holiday Season… Linda
Thanks for stopping by Linda, I love meeting new people. Your party sounds absolutely divine, you’ll have to come back and share pictures of what you end up creating for your centerpieces, I am sure they will be lovely!