Hello! Who else out there loves a cute, quick and inexpensive craft project? Those are some of my favorite kind of crafts, especially when they are are adorable as this DIY Mini Canvas Banner.

If you are following me on Instagram you may have seen that I’ve been in Phoenix the last few days at the Cricut Make Something You Love event. I had the privilege of joining one of my dear friends and fellow Michaels Maker, Lindi from Love the Day, at the Michaels booth for full day of crafting. Michaels asked us to come up with a quick and easy make and take project that attendees could create and we came up with this fun DIY Mini Canvas Banner, and now we want to share this little craft with you too!

What You Will Need:
- Free SVG cut file from Love the Day
- Cricut Maker
- Light Grip Mat
- Iron-on Vinyl
- Easy Press or Iron
- Weeding Tool
- Felt
- Fabric Mat
- Mini Canvas Banner (we found ours at Michaels)
- Twine or Ribbon
- Dowel Rod or Thin Popsicle Stick
- Hot Glue Gun

Step 1:
Head to Love the Day and download the free SVG cut file sayings Lindi created. Once you’ve downloaded the files use the Cricut to cut out your chosen saying on iron-on vinyl. Don’t forget to select “mirror cut” for this iron-on project!

Step 2:
Next, weed your saying using the Cricut weeding tool. Place the saying on the front of your mini canvas banner.
Step 3:
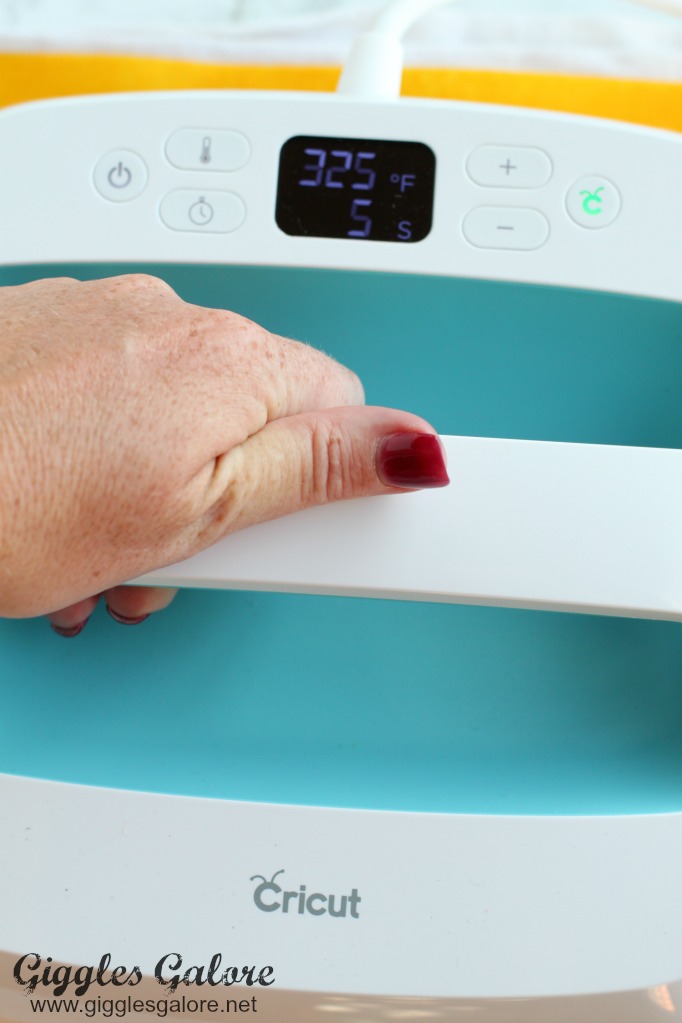
Use the new Cricut Easy Press to adhere your vinyl saying to the canvas banner. I am so in love with this new product, it has definitely taken the guess work out of iron-on projects for me. It comes with a cheat sheet for temperature settings and a timer to help you get the best results based on the material you are using for your project.
Step 4:
Once you have adhered your vinyl to the banner carefully remove the adhesive backing.

Step 5:
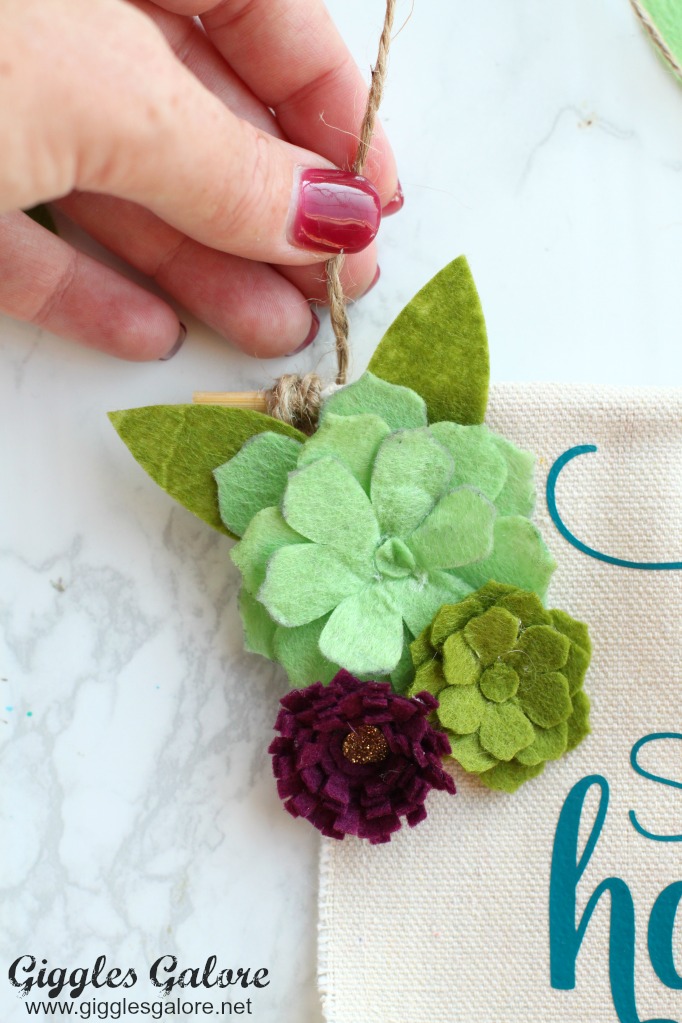
Next, comes the fun part. Create a few felt flowers in Cricut Design Space. I used the Flower Shoppe cartridge to create a variety of different felt flowers. Also, fee free to add any additional embellishments, like ribbon, yarn tassel’s to your banner.


Step 6
Now it’s time to add the dowel rod to the back of the banner. I created a small pocket for my rod to slip through and used hot glue to secure it in place.

Step 7:
Use the twine or ribbon to create the hanger for your mini banner. Wrap the twine around one end of the stick a few times and tie the twine together to secure it in place. Now take the remaining piece and repeat the same steps on the other site.

There you have it, a cute, quick and inexpensive craft you can make in less than 15 minutes. I love how these turned out and had lots of fun crafting with the attendees at the Michaels booth at the Cricut Make Something You Love event. I would love to see your mini banner creations so make sure you tag @Giggles_Galore on IG and Twitter with a photo of what you create!

This is a sponsored conversation written by me on behalf of Cricut. The opinions and text are all mine.


What a super idea and so cute! Thank you for sharing~ Great video~
Such a cute idea! Thanks for sharing at the Inspiration Spotlight party @DearCreatives Pinned & sharing.
Hi Mariah! Did you cut the banners into this shape or did you find them this way? Would LOVE to do this craft for all of the holidays but can’t find any canvases this size! Please help!
Hi Alex! I have done both. I found precut canvas banners in the craft section at Michael’s, they were sold in a package by Recollections. I’ve also used my Cricut to cut them out of canvas material.